
Pane Cafone
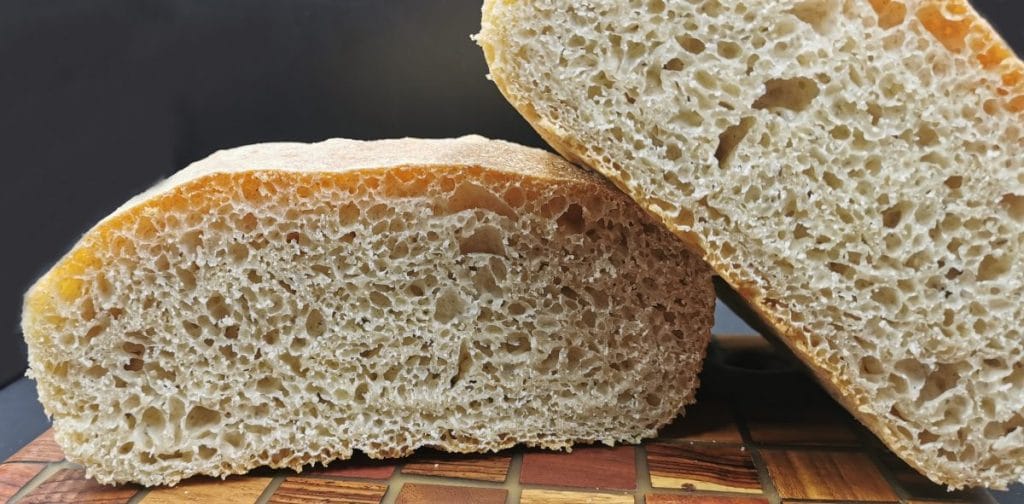
How do you make homemade pane cafone?
Mix the flours, yeast, and water; add salt and oil until combined. Let the dough ferment cold for 12 hours. Make folds to build tension, divide, and let rise for another 3–4 hours at room temperature. Bake at 250°C for 20 minutes, finishing with the door ajar for 15 minutes to achieve a crisp crust.
Delicious bread, crisp on the outside and soft on the inside. From the Campania region of Italy. Few ingredients and easy preparation—there is nothing left to do but make it. Its flavor is spectacular; the marriage of the two types of flour creates a blend worth trying.
The screen will not turn off while you cook.
Servings: Makes about 1.5 kg
Ingredients
- Its flavor is spectacular; the marriage of the two types of flour creates a blend worth trying.
- 800 g type 2 flour
- 200 g durum wheat semolina
- 750 ml water
- 3 g activated dry yeast or 7 g fresh brewer’s yeast
- 20 g salt
- 20 ml oil

Instructions
Place 700 ml of water in a bowl and dissolve the fresh yeast. If using dry yeast, skip this step.

In another large bowl, place the flours and add the water with the fresh yeast. If using dry yeast, add it already activated and pour in 550 ml of water. Mix very well with the help of a spoon.
Add the salt and the remaining 50 ml of water. Mix well.
Finally, pour in the oil.
When the flour has absorbed all the water and oil, cover and let the dough rest for 12 hours in the refrigerator.
After 12 hours, remove the dough from the refrigerator.
The dough will be very sticky. Place it on a floured surface, flour your hands as well so it does not stick, and sprinkle a little flour over it.
Turn it over on itself and then make a fold toward the center.
Make another fold toward the other side.
Continue until you obtain a smooth ball that is no longer sticky.
This whole process takes about 5 minutes. Place it back in the bowl and let it rest for 30 minutes at room temperature.
After that time, take the dough again and divide it into two more or less equal parts. Or, if you have bread molds for the final proofing and baking, divide it according to the molds you have. For example, I use one large mold and another small proofing mold.
Take each piece, place it on the floured surface, and fold it over itself (stretch it into a rectangle, then fold it from the longer side). If you want to place the dough in molds, flour the proofing mold well and grease the other one, then place the larger part of the dough inside.
Let it rest for another 3–4 hours, until it doubles in volume; I place it in the turned-off oven with the light on.
Heat the oven to 250°C (480°F). If you have part of the dough in a proofing mold, once the oven is hot, turn it out and place it next to the other mold, previously floured.
It will be ready to bake once the oven has reached the selected temperature.
Bake in the lower part of the oven at 250°C (480°F) for 20 minutes; then bake for another 15 minutes with the oven door slightly open, using a spoon or something else to keep it from closing (a ball of aluminum foil would also work).
The delicious aroma of fresh bread that will fill your home will be priceless!

Note: If you do not have bread molds for baking or proofing, follow the entire procedure described above until you divide the dough in two. Take the oven tray, place a white cloth on it, flour it generously, and place each folded rectangle on it with the seam facing upward. Put them in the turned-off oven to proof for another 3 or 4 hours, until the dough doubles in volume. At this point, gently take the proofed dough, resting it on your arm and touching it as little as possible so as not to deflate it. Place it on a baking tray with a little flour so it does not burn during baking, and bake.


Enjoy your meal!
Reviews
There are no reviews yet.
- Its flavor is spectacular; the marriage of the two types of flour creates a blend worth trying.
- 800 g type 2 flour
- 200 g durum wheat semolina
- 750 ml water
- 3 g activated dry yeast or 7 g fresh brewer’s yeast
- 20 g salt
- 20 ml oil